Chevy Truck Won’t Start Just Clicks: Diagnostic and Repair Guide
Few things are more frustrating than climbing into the cab of your Chevy Silverado, Tahoe, or Colorado, turning the key or pressing the start button, and being met with nothing but a clicking sound. The engine refuses to crank, leaving you stranded in your driveway or a parking lot.
When a Chevy truck won’t start and just clicks, it is a clear sign that electrical energy is trying to reach your starter motor, but something is blocking the path or failing to deliver the required power. This guide will walk you through how to diagnose the clicking sound, identify the root cause—whether it is a dead battery, a failing starter, corroded terminals, or bad ground wires—and get your truck back on the road.
Key Takeaways
- Decipher the Click: A rapid-fire clicking noise typically indicates a weak battery, poor terminal connections, or a failing alternator. A single, solid click usually points to a failed starter motor, a bad solenoid, or a seized engine.
- Check the Terminals First: Corrosion or loose battery clamps are the most common culprits in Chevrolet trucks, particularly GMT800 (1999–2006) and GMT900 (2007–2013) platforms.
- The Voltage Test: A healthy 12-volt battery should read at least 12.6 volts when the engine is off. Anything below 12.0 volts is insufficient to turn over a large V8 engine like the Vortec or EcoTec3.
- Clean the Grounds: GM trucks are notorious for ground strap deterioration. Inspecting the engine block, frame, and firewall ground connections can save you from buying unnecessary parts.
- Emergency Fixes: If you are stranded, a jump-start can bypass a dead battery, while gently tapping the starter motor casing with a tool can sometimes temporarily free a stuck starter armature.
Deciphering the Click: The Diagnostic Matrix
Before grabbing your tools, listen closely to the sound your truck makes when you attempt to start it. The frequency and volume of the clicking noise provide immediate clues about where the electrical bottleneck is occurring.
| Sound Observed | Likely Culprit | Root Cause | Immediate Action |
|---|---|---|---|
| Rapid, Machine-Gun Clicking | Low Voltage / High Resistance | Battery is discharged, terminals are corroded, or the alternator has failed to charge the battery. | Test battery voltage; clean and tighten battery terminals. |
| A Single, Loud “Clunk” or Click | Starter Motor / Solenoid | The starter solenoid is engaging, but the starter motor armature cannot spin, or the battery lacks the amperage to turn the motor. | Perform a voltage drop test on the starter; try the “tap test.” |
| Faint, Quiet Clicking from the Fuse Box | Starter Relay | The control circuit is working, but power is not passing through the high-amperage circuit to the starter. | Swap the starter relay with an identical non-critical relay (e.g., the AC compressor relay). |
| No Click at All | Ignition Switch / Safety Switch | The signal is not reaching the starter system. Could be a blown fuse, neutral safety switch, or security system fault. | Ensure the truck is fully in “Park” or “Neutral”; check the starter fuse. |
Step-by-Step Troubleshooting Workflow
To diagnose your Chevy truck systematically, work from the easiest, least expensive potential issues to the more complex mechanical components.
Tools and Equipment Needed
- Digital Multimeter (DMM)
- Wire terminal brush or sandpaper
- Basic socket set (specifically 8mm, 10mm, and 13mm wrenches)
- Jumper cables or a portable lithium jump pack
- Safety glasses and work gloves
Step 1: Inspect and Clean the Battery Terminals

Chevrolet trucks, especially those driven in harsh climates or used for heavy towing, are highly susceptible to battery terminal corrosion. Acid venting from the battery posts creates a white, powdery crust (lead sulfate) that acts as an insulator, preventing high amperage from reaching the starter.
- Turn off the ignition and remove the key.
- Inspect the terminals: Look at the positive (+) and negative (-) battery posts. If you see white, green, or blue crust, you have high resistance.
- Check for looseness: Grab the battery cables and try to wiggle them. If they twist on the post, they are too loose to carry the 300+ amps required to start the engine.
- Clean the connections:
- Disconnect the negative cable first (usually a 10mm or 8mm nut), then the positive cable.
- Mix baking soda and warm water, or use a dedicated battery cleaner spray to dissolve the corrosion.
- Scrub the posts and the inside of the cable clamps with a wire terminal brush until you see shiny metal.
- Reconnect the positive cable first, then the negative. Tighten them securely so they cannot be moved by hand.
[Battery Post] <--- Clean to shiny metal
      ^
[Cable Clamp]  <--- Scrub inside surface with wire brush
Step 2: Test the Battery Voltage and State of Charge
A battery can have enough power to run the headlights, radio, and dashboard lights, but still lack the cold cranking amps (CCA) required to turn over a 4.8L, 5.3L, 6.0L, or 6.2L V8 engine.
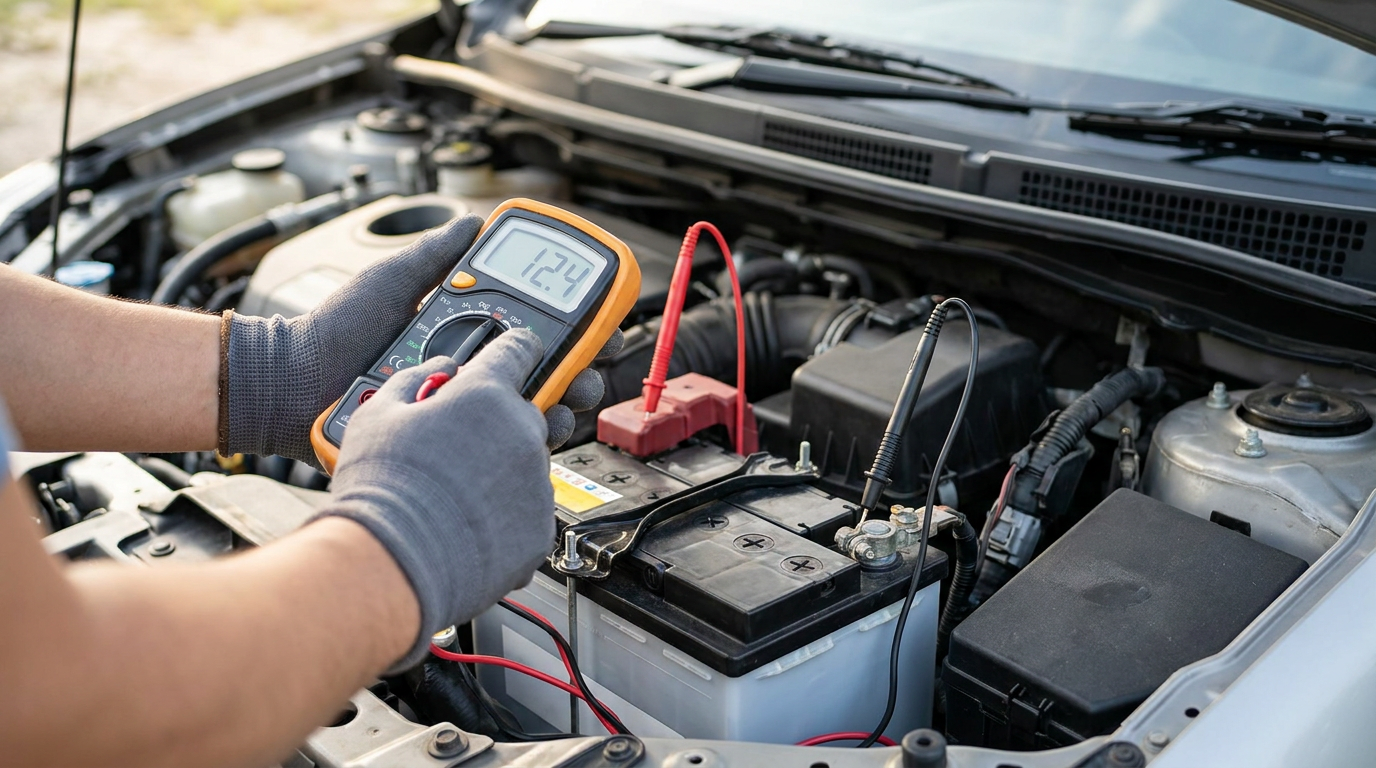
- Set your digital multimeter to DC Volts (20V scale).
- Touch the red probe to the positive (+) battery terminal and the black probe to the negative (-) terminal.
- Interpret the readings:
- 12.6V to 12.8V: The battery is fully charged.
- 12.2V to 12.4V: The battery is partially discharged (approx. 50%). It may click but fail to start.
- Under 12.0V: The battery is effectively dead. It needs to be charged or replaced.
- Perform a Load Test (with a helper):
- Keep the multimeter probes on the battery terminals while your helper attempts to start the truck.
- Watch the voltage drop. If the voltage plunges below 9.6 volts during the crank attempt, the battery is weak, damaged, or cannot hold a load. It must be replaced.
Step 3: Check the Ground Connections (The GM Weak Point)
One of the most common, overlooked causes of a clicking Chevy truck is a bad ground connection. The electrical current must flow from the battery, through the starter, and back to the battery via the truck’s metal frame and engine block. If these ground paths are corroded or broken, the starter cannot draw enough current.
Key Chevy Ground Locations to Inspect:
- The Main Battery Ground: Follow the black negative battery cable down to where it bolts to the engine block (usually on the lower passenger side front) or the vehicle frame. Ensure this connection is rust-free and tight.
- The Engine-to-Body Ground Strap: This is often a braided metal strap located at the rear of the engine block near the firewall on the driver’s side. If this strap is green, frayed, or snapped, it will cause intermittent starting issues and erratic dashboard behavior.
- The Frame Ground (G102/G201): On many Silverado and Sierra trucks, a ground wire runs from the battery to the frame rail directly under the driver’s side door or near the front bumper. Road salt and moisture easily corrode this connection.
To test for a bad ground: Connect one end of a single jumper cable to the negative (-) battery terminal, and clamp the other end directly to a clean, unpainted metal part of the engine block. Attempt to start the truck. If it fires right up, you have a bad ground wire that needs to be cleaned, re-bolted, or replaced.
Step 4: The Starter “Tap Test” (Emergency Workaround)
If you hear a single, heavy click when turning the key, the starter motor’s internal electrical brushes may be stuck on a “dead spot” on the armature, or the solenoid plunger may be seized.
This classic roadside trick can temporarily align the internal components enough to get the truck started one last time so you can drive it to a repair shop.
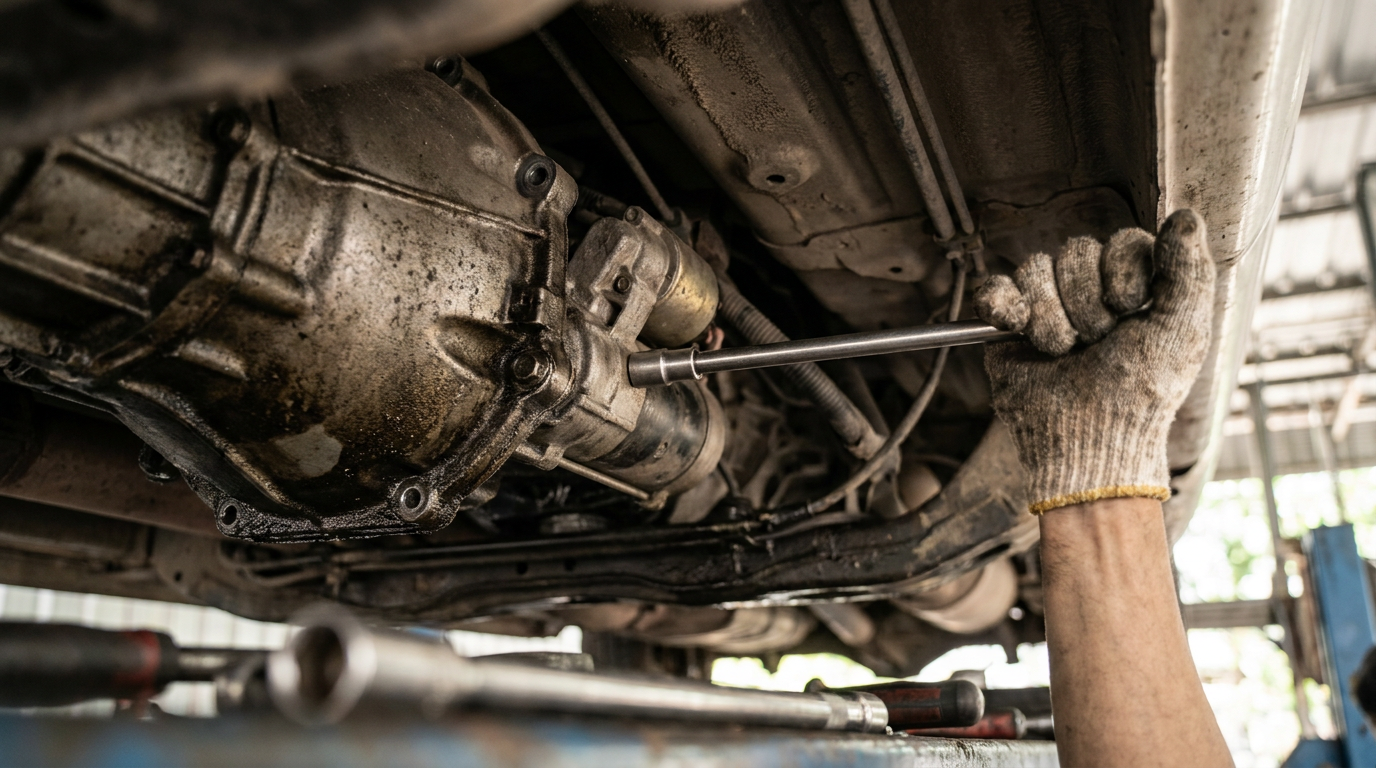
- Locate the starter motor. On most Chevy V8 and V6 engines, the starter is located on the lower passenger side of the engine, near the transmission bellhousing.
- Locate a long metal rod, extension bar, or a hammer.
- While a helper holds the ignition key in the “Start” position (or presses the Start button), gently but firmly tap the side of the starter motor casing.
- Caution: Do not strike the smaller solenoid cylinder mounted on top of the starter, and do not touch the positive electrical terminal with your metal tool, as this will create a massive spark.
- If the starter engages and the engine fires up, your starter motor is failing and must be replaced immediately.
Step 5: Test the Starter Relay and Fuses
If you hear a very faint clicking coming from the engine bay fuse box, but nothing from the engine itself, the starter relay may have failed.
- Open the under-hood fuse block (typically located on the driver’s side fender well).
- Locate the diagram on the underside of the fuse box cover and find the STRTR (Starter) Relay and the Starter Fuse (usually a 30A or 40A cartridge fuse).
- Inspect the fuse to ensure the metal element inside is not broken.
- To test the relay, locate an identical, non-essential relay in the box (such as the AC compressor or rear defogger relay) that shares the same part number.
- Swap the non-essential relay into the starter relay slot.
- Attempt to start the truck. If it starts, purchase a replacement relay at an auto parts store.
Chevy-Specific Failure Points
While all internal combustion vehicles operate on similar electrical principles, Chevrolet trucks have specific engineering traits and common failure points that owners should look out for.
1. The 175-Amp Mega Fuse (GMT900 & K2XX Platforms)
On many 2007–2019 Chevy Silverados, Tahoes, and Suburbans, there is a high-amperage “Mega Fuse” mounted on the firewall or directly on top of the battery fuse block. This fuse handles the primary power distribution from the alternator and battery to the starter.
- The Issue: Over time, the nuts holding this fuse down can loosen due to engine vibration, or the fuse can develop micro-cracks. This creates extreme electrical resistance, resulting in a clicking starter, dimming lights, or a completely dead electrical system.
- The Fix: Ensure the mounting nuts are torqued down snugly, and inspect the fuse casing for heat damage or cracking.
2. GM Passlock / Anti-Theft System Interference
If your Chevy truck clicks once, refuses to crank, and you notice a flashing “Security” light or a padlock icon on the instrument cluster, your vehicle’s anti-theft system may be disabling the starter.
- The Issue: The Passlock system fails to read the resistance value from the ignition cylinder, cutting fuel and starter signal.
- The Fast Reset Procedure:
- Turn the ignition key to the “On” position (do not try to crank).
- Leave the key in this position for exactly 10 minutes. The security light should stop flashing and stay solid or go out.
- Turn the key to the “Off” position for 30 seconds.
- Attempt to start the truck. This relearn procedure often bypasses temporary anti-theft glitches.
3. Solenoid Heat Soak
Chevy V8 engines run hot, and the starter motor is positioned close to the exhaust manifold. On older models, or trucks with aftermarket headers, the starter solenoid can experience “heat soak.”
- The Issue: When the engine is hot, the copper windings inside the solenoid expand, increasing resistance. The solenoid clicks but cannot actuate the starter plunger. Once the engine cools down for 30 to 45 minutes, the truck starts perfectly.
- The Fix: Install a heat shield wrap around the starter, or upgrade to a high-torque, mini-starter designed to resist thermal transfer.
How to Jump-Start Your Chevy Truck Safely
If your diagnosis points to a discharged battery, jump-starting is the quickest way to get moving. Modern Chevy trucks have sensitive electronic control modules (ECMs), so following the correct connection sequence is critical to prevent voltage spikes.
The Step-by-Step Connection Sequence:
[Dead Chevy Battery]                [Donor Vehicle Battery]
  (Positive +) <======================> (Positive +)
  (Negative - Ground to Engine) <====== (Negative -)
- Position the donor vehicle close to your Chevy truck without the two vehicles touching. Turn off the ignition on both vehicles.
- Connect the red positive (+) clamp of the jumper cables to the positive terminal of your dead Chevy battery (or the red-capped remote positive jump post under the hood).
- Connect the other end of the red positive (+) cable to the positive terminal of the donor vehicle’s battery.
- Connect the black negative (-) clamp to the negative terminal of the donor vehicle’s battery.
- Connect the other end of the black negative (-) cable to a clean, unpainted metal part of your Chevy’s engine block, alternator bracket, or frame. Do not connect it directly to the dead battery’s negative terminal, as this can ignite escaping hydrogen gas.
- Start the donor vehicle and let it run at a high idle (approx. 1,500 RPM) for 3 to 5 minutes to feed some surface charge into your truck’s dead battery.
- Attempt to start your Chevy truck. Once it starts, let both vehicles idle connected for a minute.
- Disconnect the cables in the exact reverse order: Black from the jumped Chevy, black from the donor vehicle, red from the donor vehicle, and finally red from the jumped Chevy.
- Keep your truck running for at least 20 to 30 minutes (ideally driving at highway speeds) to allow the alternator to recharge the battery.
Repair vs. Replacement: Cost and Decision Framework
If troubleshooting reveals that a component has failed, use the following framework to estimate your repair costs and decide whether to tackle the job yourself or take it to a professional mechanic.
Cost Breakdown Table (Estimated for 2026)
| Component | Part Cost (DIY) | Professional Labor Cost | Total Estimated Cost | Difficulty Level (DIY) |
|---|---|---|---|---|
| Battery Replacement | $120 – $220 | $20 – $50 | $140 – $270 | Easy: Requires basic hand tools and 15 minutes. |
| Starter Motor & Solenoid | $110 – $250 | $150 – $300 | $260 – $550 | Moderate: Requires working under the vehicle; must disconnect the battery first. |
| Battery Cables / Ground Straps | $25 – $75 | $100 – $200 | $125 – $275 | Easy to Moderate: Accessing frame mounts can be tight or rusty. |
| Starter Relay | $10 – $25 | $0 (DIY) | $10 – $25 | Very Easy: Plug-and-play installation in the fuse box. |
| Alternator Replacement | $150 – $300 | $100 – $200 | $250 – $500 | Moderate: Requires releasing the serpentine belt tensioner. |
DIY vs. Professional Mechanic Decision Tree
Go DIY if:
- You have a safe, level area to jack up the truck and secure it on heavy-duty jack stands (necessary for starter motor replacement).
- The issue is a battery, relay, or dirty terminals, which require only basic hand tools.
- You have a multimeter and feel comfortable reading voltage outputs.
Call a Professional if:
- The truck is stuck in an unsafe location or on an unlevel surface where jacking is dangerous.
- You suspect a complex wiring harness issue, a failed ignition switch inside the steering column, or a cracked flywheel/flexplate ring gear (indicated by a loud, high-pitched screeching sound when attempting to start).
- The starter mounting bolts are heavily rusted, seized, or rounded off, requiring extraction tools or heat torches to remove.
Frequently Asked Questions
Why does my Chevy truck click when I try to start it?
The clicking sound is the starter solenoid rapidly cycling on and off. When you turn the key, the solenoid attempts to push the starter gear into the engine’s flywheel. If your battery has low voltage or there is high resistance in the cables, the voltage drops instantly when the starter draws current. This drop causes the solenoid to disengage, the voltage rises again, the solenoid re-engages, and the cycle repeats rapidly, creating the characteristic clicking noise.
Can a bad alternator cause a clicking sound?
Yes, indirectly. The alternator’s job is to recharge the battery while the engine is running and power the vehicle’s electrical systems. If the alternator fails, your truck will run entirely off the battery until the battery drains below the threshold required to crank the engine. When you next try to start the truck, you will hear clicking because the alternator left the battery dead.
How do I know if my starter or my battery is bad?
A quick way to tell is by observing your interior dome lights and headlights while trying to start the truck:
- If the lights dim significantly or go completely dark when you hear the click, the battery is weak, or the connections are bad.
- If the lights remain bright and do not flicker when you hear a single loud click, the battery is likely healthy, but the starter motor or solenoid has failed mechanically.
Will jump-starting work if my starter is dead?
No. Jump-starting only provides external electrical power to bypass a dead or weak battery. If the starter motor itself has burnt-out internal windings, worn-out brushes, or a seized armature, introducing more electrical power via jump cables will not make it spin.
Where is the starter located on a Chevy Silverado?
On almost all Chevy Silverado trucks equipped with V8 engines (such as the 4.8L, 5.3L, and 6.0L Vortec, or the newer 5.3L and 6.2L EcoTec3), the starter is located on the lower passenger side of the engine block. It is mounted horizontally where the engine meets the transmission bellhousing. To access it, you must crawl underneath the truck.
Conclusion
When your Chevy truck won’t start and just clicks, you do not have to assume the worst. More often than not, the issue lies in a depleted battery, loose cable clamps, or corroded ground connections rather than a catastrophic mechanical failure.
By listening to the speed of the clicking sound, checking your battery voltage with a multimeter, and ensuring your ground paths are clean and secure, you can pinpoint the fault. If these basic steps do not resolve the issue, use the starter tap test to get moving, and prepare to replace the starter motor or seek professional assistance. Taking a systematic approach to diagnostics will save you time, money, and unnecessary trips to the auto parts store.
